You can dig trench safely and efficiently with the right plan, tools, and technique—whether you’re laying pipe, improving drainage, or installing wiring. Start by sizing the trench, choosing the appropriate tools or machine, and protecting yourself from collapse and other hazards to keep the job quick and safe.
This post dig trenches breaks the process into clear steps you can follow: the essential equipment to have on hand, how to prepare the site, and practical step-by-step trenching techniques that minimize rework and risk. Keep going to learn which tools suit your project, how deep and sloped the trench should be, and how to work with soil conditions to finish the job right.
Essential Tools and Equipment
You need the right mix of tools, protective gear, and equipment matched to trench depth, length, and soil conditions. Choose between hand tools and powered trenchers, prioritize protective equipment, and match tool selection to soil type for efficiency and safety.
Manual vs. Mechanized Options
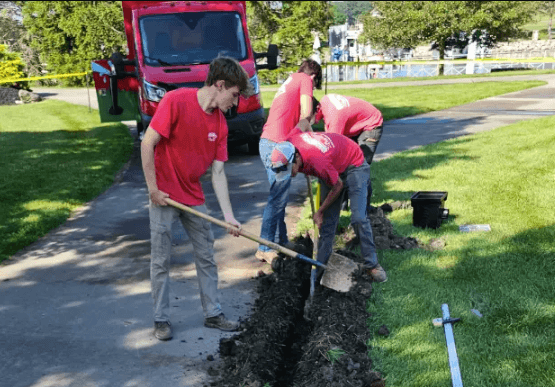
Manual tools give you control in tight spaces and cost less upfront. Carry a trenching shovel (triangular point), a trenching hoe, a pick mattock for rocky layers, and a flat shovel for finishing. Use a measuring tape and string line to keep depth and slope consistent.
Mechanized options speed work and reduce fatigue on larger jobs. Consider walk-behind or ride-on trenchers for trenches wider than 6 in and deeper than 8 in. Mini-excavators and skid steers suit deeper or longer runs and compacted or stony ground. Rent machinery for one-off projects to avoid ownership cost.
Match tool power to trench length: hand tools for short, shallow runs; powered trenchers or mini-ex for long, deep, or hard-packed trenches. Always inspect blades, belts, and hydraulic lines before use.
Safety Gear and Precautions
Protective equipment reduces injury risk when digging. Wear a hard hat, safety glasses, hearing protection for powered tools, high-visibility vest, gloves with good grip, and steel-toe boots. Use knee pads when working low and a dust mask if soil is dry or contains organic dust.
Follow these site precautions: locate underground utilities with a utility marking service before you dig. Slope or shore trench walls according to depth and soil type—OSHA rules apply for trenches 5 ft or deeper. Keep spoil piles at least 2 ft from trench edges and provide safe access (ladders) within 25 ft of workers.
For mechanized equipment, use roll-over protection, check for hydraulic leaks, and never operate under unsecured loads. Establish a clear communication method between machine operators and ground workers.
Selecting the Right Tools for Soil Type
Identify soil texture before choosing blades and equipment. Sandy, loose soils require narrower, sharper trenching teeth and frequent shoring to prevent collapse. Use trencher teeth designed for abrasive, granular material to maintain cutting speed.
Clay and cohesive soils benefit from wider blades and greater leverage—pick mattocks and trenching shovels with a strong socket handle work well. For mixed soils with roots or rock, choose a trencher or mini-excavator with hardened teeth and hydraulic power; hand digging will be slow and labor-intensive.
For extremely compacted, rocky layers, bring a hydraulic breaker or auger attachment, and consider pre-wetting the ground if appropriate. Always match blade hardness, machine horsepower, and digging width to soil resistance to avoid tool damage and excessive operator fatigue.
Step-by-Step Trenching Techniques
You will plan layout, control soil stability, and manage water to keep the trench safe and functional. Each step below gives concrete actions, tools, and checks you should use on site.
Site Preparation and Layout
Mark the trench line with bright paint or stakes spaced every 3–5 feet so you can maintain a straight run. Call local utility locating services at least 48–72 hours before digging; confirm all markings and keep a printout of the utility map on site.
Clear vegetation and remove topsoil to expose a stable working surface. If you expect heavy equipment, flag access routes and create a firm turning/parking pad using compacted aggregate to avoid rutting.
Determine trench depth and width from plans and local code. Lay out batter slopes or shoring placement based on soil type—use a proctor or engineer if soil is silty, sandy, or has mixed layers. Keep spoil piles at least 2 feet from the trench edge and mark pedestrian/vehicle exclusion zones.
Gather tools and PPE: trenching shovel, pick mattock, laser level or transit, tape measure, shoring equipment, sloping stakes, and hard hats, boots, gloves, and eye protection. Brief crew on emergency egress points and daily excavation limits.
See also: How IoT Is Transforming Smart Homes
Excavation Best Practices
Excavate in controlled lifts, removing soil in uniform thicknesses rather than undermining the face. For mechanical trenching, operate the excavator parallel to the trench and use the boom and bucket to maintain consistent depth and slope.
Check trench dimensions frequently with a measuring rod and laser level. If trench walls show cracks, bulges, or sloughing, stop work and install shoring or trench boxes immediately. Never enter an unsupported trench deeper than 5 feet without protective systems in place.
Maintain safe access and egress: ladders must be within 25 feet of workers and extend 3 feet above the trench rim. Keep tools and materials back from edges to reduce collapse risk. Document daily inspections and record any changes in conditions or weather that could affect stability.
Managing Water and Drainage Issues
Identify the water table and plan dewatering before you dig. Use sump pumps in staged sumps or well points for shallow groundwater; size pumps to exceed anticipated inflow by 20–30% to prevent backups.
Divert surface water away from the trench with berms, sandbags, or temporary channels. Install temporary pipe or lined channels for prolonged runoff and keep the trench bottom clear of standing water to avoid weakening the walls.
If you encounter seepage or flowing water, pause excavation and consult a geotechnical engineer about permanent drainage, cut-off trenches, or subdrains. Maintain continued monitoring and record pump run-times, discharge locations, and any contamination controls you implement.